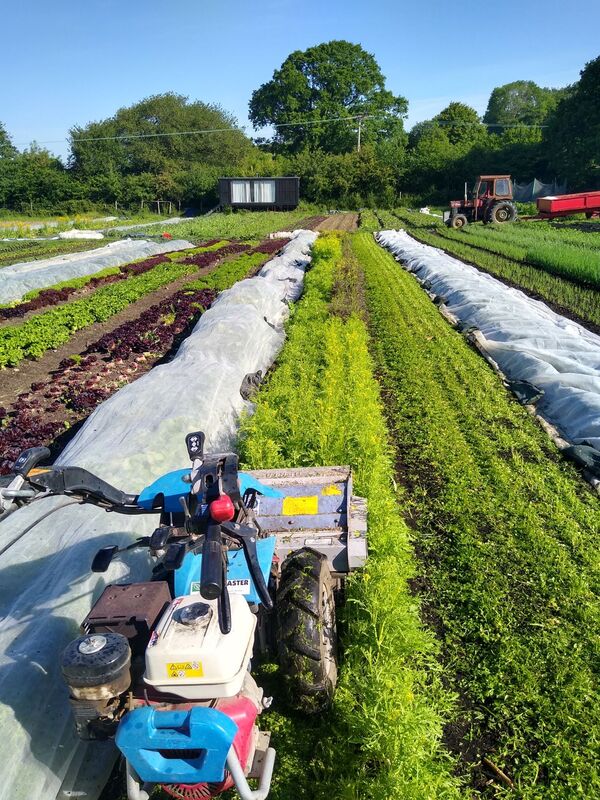
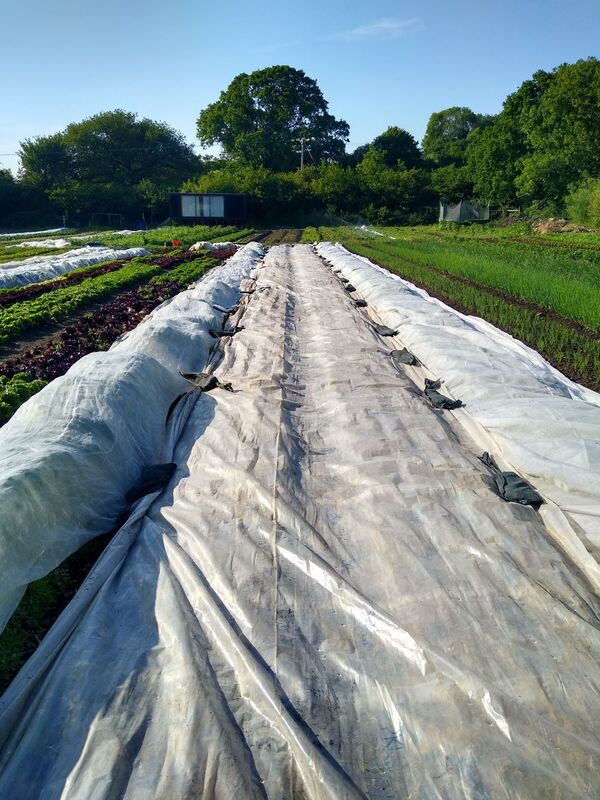
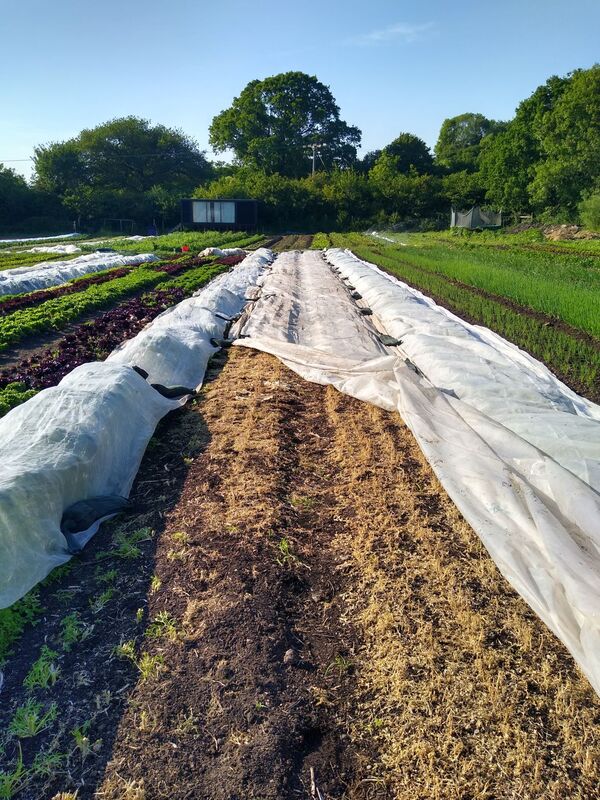
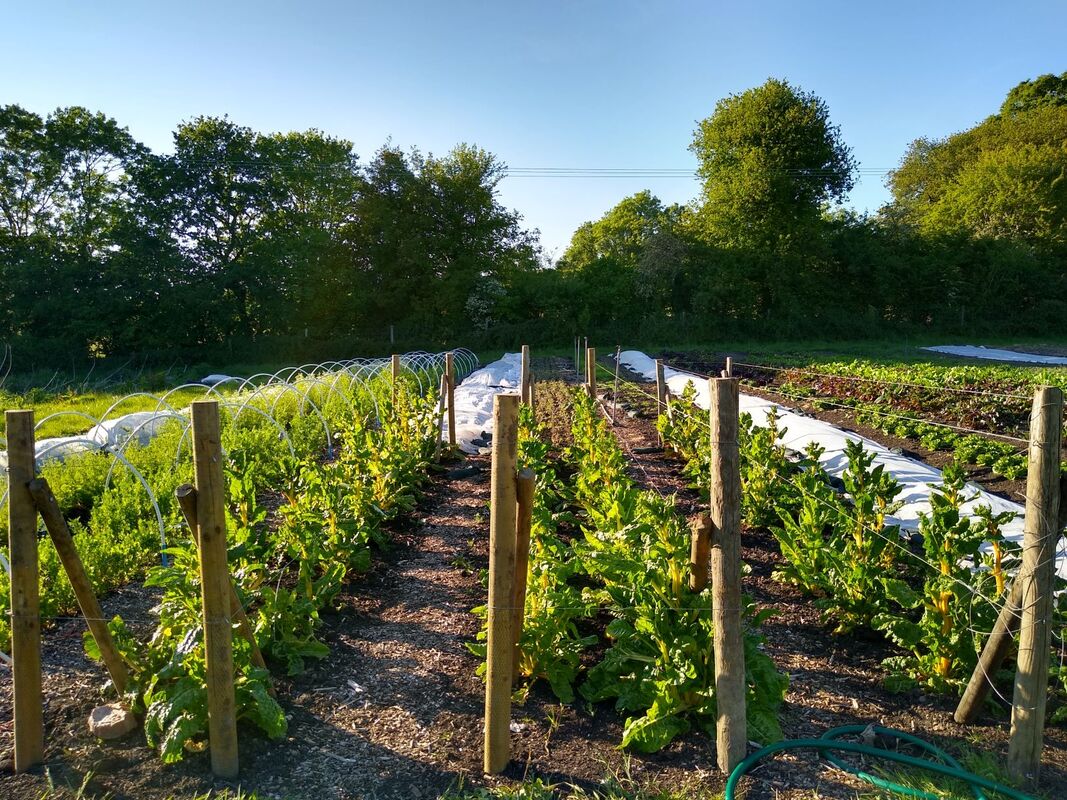
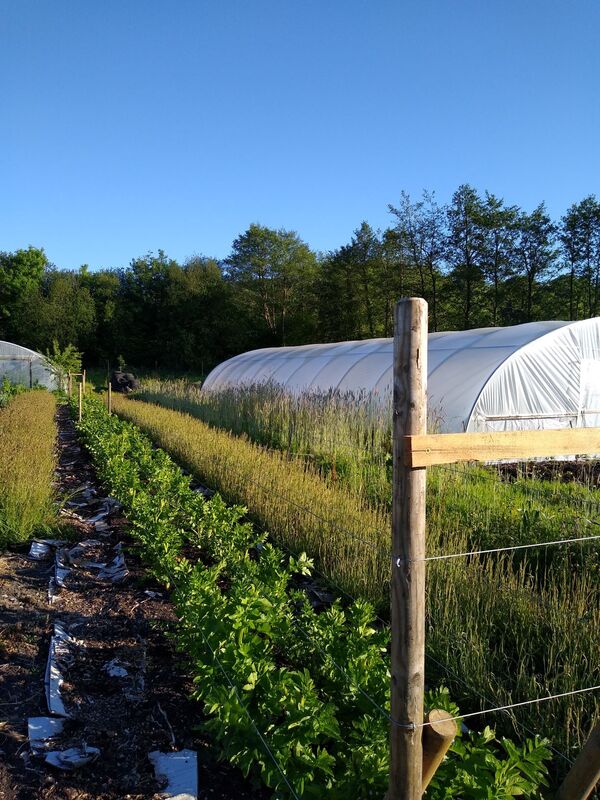
 Lots more planting and everything is growing so fast! We have been spending the last couple of weeks continuing to prepare beds and plant them. We got a lot in the ground this week including more chard, perpetual spinach, more basil and sage (in the heat of the polytunnels!), new zealand spinach, lettuce, other salad leaves including mallow, orache, burnet and buckshorn plantain, beetroot, dwarf french beans, sweetcorn, more kale, and some globe artichokes. Next week...We will be continuing with planting next week - getting in more successions of beetroot, getting the squash in and some more kale and sowing some more carrots. We will also start to train some of the indoor tunnel crops such as the tomatoes, peppers and cucumbers - by sideshooting we will encourage more fruits, and we need to stake the peppers too. We have just started to prepare some of the beds that had early crops in such as turnips, radish, salads and kale in different ways, and something that is working especially well for us in this heat is solarization - this is where we mow down the old crop (and any weeds) and then lay down clear plastic over the bed weighed down with sandbags. This heats up and kills off and weeds and crop residue. It can mean that a bed can be ready to plant within a day without having to cultivate. It is very impressive and a useful technique for hot weather. It can also be really useful to create stale seed beds before we direct sow crops like carrots which otherwise have to compete with the weeds. In this case we usually have a cultivated bed that we water and let the first flush of weeds germinate and then lay the plastic over it for a day and all of the weeds are killed off. We can then sow into a weed free bed and the carrots can grow quickly with very little competition from the weeds. Saving seeds We grow a few crops for seed at Trill, some for our own use and to exchange with other growers and some comercially for small seed companies like Real Seeds and Tamar Organics. It is always interesting to see the crops full life cycle which would generally otherwise not be seen, for example with chard and parsnips that we are saving for seed this year. When they start flowering they grow very large and require supports which we put up this week. These crops were both sown last year as you would for growing the crop normally. We then selected the healthiest crops and those that fit to the variety characteristics and replanted them at wider spacings to allow good ventialtion when they get to flowering and seeding stage. We will be harvesting the seed in July/August for these. What's in the bags at the moment?
We are continuing to take on a few more organic veg bag delivery customers in Axminster and Seaton so please do get in touch if you would like to get an order from us. For those of you who have been getting the organic veg bag deliveries, we are getting more and more of our own produce now, and it is just potatoes that are not our own at the moment (potatoes will no longer be in the bags every week). We have had the first of the beetroot, broad beans, wet garlic and little gem in the bags the last couple of weeks, and we will be harvesting agretti next week for some of the bags. Agretti is a lovely Italian vegetable which we have grown for a few years now. It can simply be blanched and then mixed with a bit of fried garlic, olive oil and salt and pepper. We will also have kohl rabi in the bags probably the week after next - this is lovely just sliced thinly and eaten raw with a vinaigrette. The first of our red little gem lettuce are ready now too, and don't forget - these are lovely on the bbq or griddled (just salt them a bit first for half an hour or so and then place on the bbq/griddle and char them. Them just add a squeeze of lemon. We are probably just two weeks away from cucumbers being ready for the veg bags, and courgettes will be ready about the same time too - that will really feel like summer has started!
5 Comments
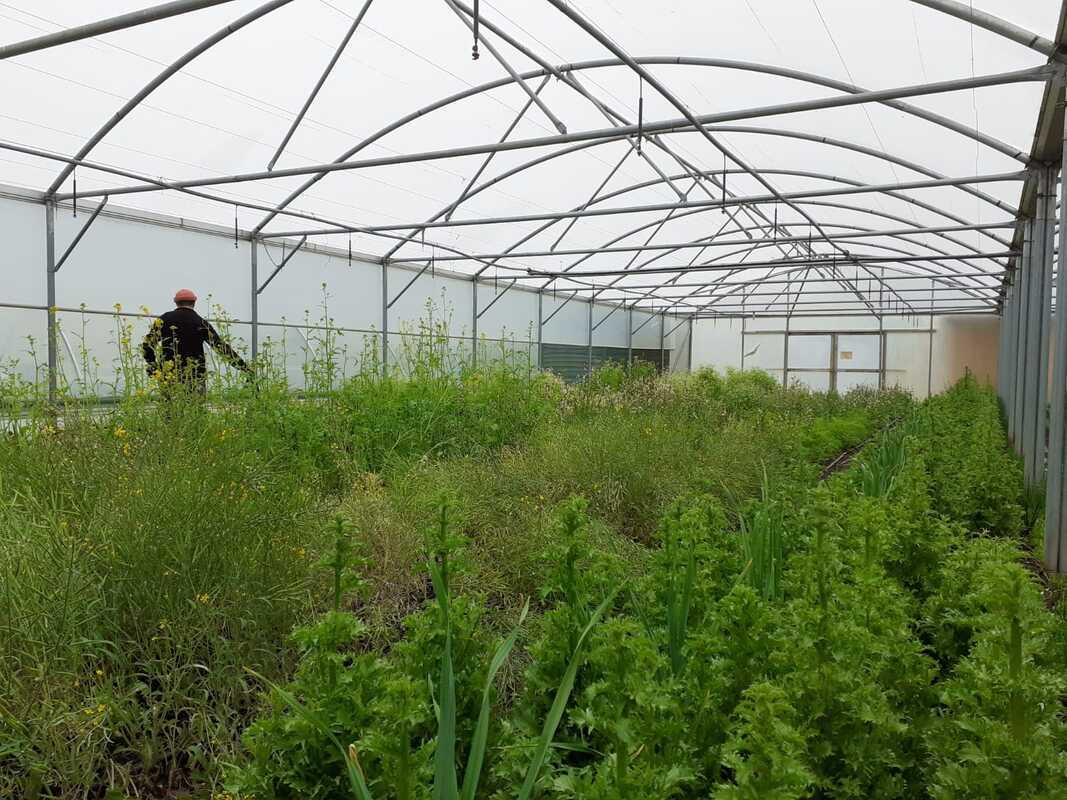
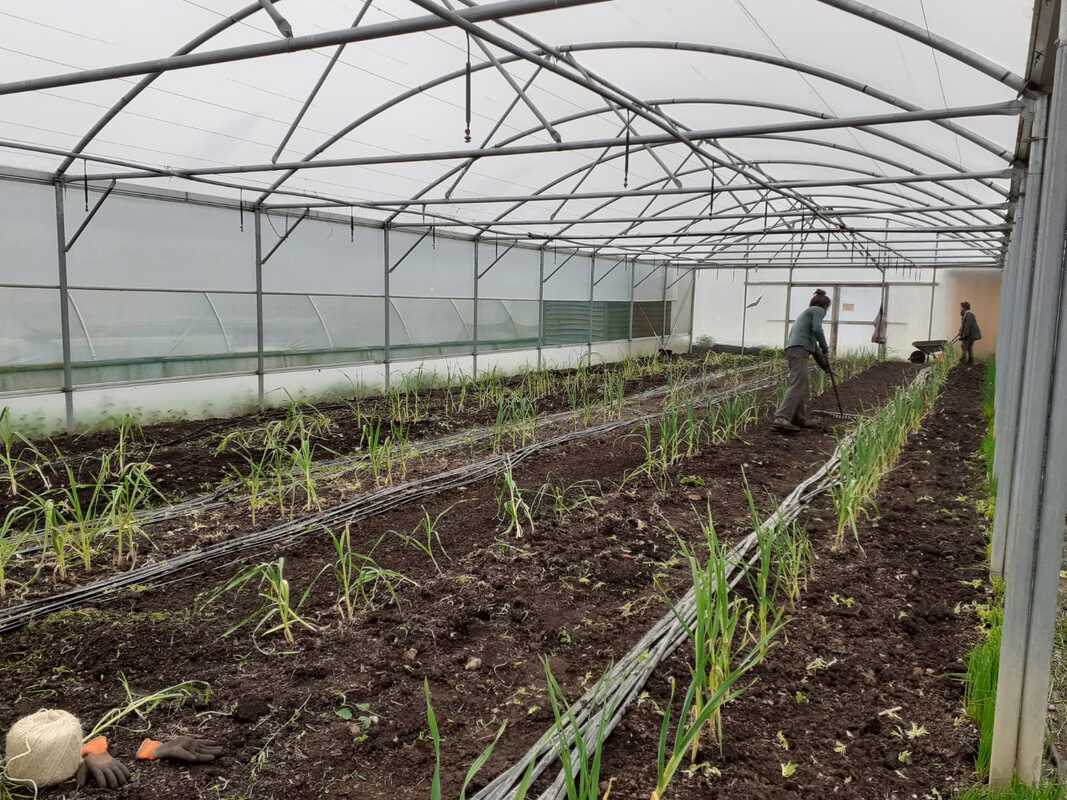
We waited until the end of the week to get the tomatoes planted, but managed to get all of them in on Friday (about 450 plants in all). They should race away as long as we can manage to keep the woodlice off them and hopefully these wretched little symphylans don't eat too many of their roots... Ellen's pictures show the process of clearing and preparing and planting the tomatoes
Next week... We will be continuing with planting next week - getting the padron peppers in the polytunnels, as well as planting out some sweetcorn, french beans outside, chard, perpetual spinach and beets along with more successions of salad leaves. What's in the bags at the moment? We are continuing to get more and more of our own produce from the polytunnels as well as out in the field now, with lots of leafy greens like perpetual spinach, chard, kale, spring greens, rocket, cress, little gem and of course our mixed salad leaves, alongside some of the spring roots like radish, salad turnips, baby beets (which will be in the bags the week after next most likely) and the spring onions and sugarsnap peas and maybe even a few broad beans from the polytunnel over the next couple of weeks... Lot's of the salad greens like the packs of rocket and the little gem, don't have to be just used for salad, but can be cooked too. The rocket can be wilted like any other green, and the little gem is great if you cut it in half or quarters and salt it for half an hour or some, then wash off the salt and dry fry or place in a hot griddle pan (or best on the bbq) until it takes on a bit of colour - a bit of charring is what you want. This technique can be used for all sorts on the bbq - like spring onions and sugarsnap peas and flat french beans (which we will have in a month or so) and radish and turnips too. We had planned to plant up the tunnels with peppers and tomatoes this last week, but with the cold nights forecast for the next few days we decided to hold off and get everything prepared for the plantings, and then focus on outdoor work. We cleared the remaining salad crops from the tunnel beds and broadforked them before putting up the strings which the tomatoes will be trained onto. We are having a bit of a nightmare with woodlice in the polytunnels along with a new pest to us - symphylans. These look like tiny white centipedes and eat new roots. They have totally stunted the spring onion plants that we planted a few weeks ago, as any new roots sent out are eaten. We are hoping that as the tomatoes have a bigger root system they will be able to overcome the damage caused by the symphylans. Fingers crossed...Often in organic systems we see a pest population arise when there is imbalance, but this is often overcome with the rise in population of predators as a result of more food supply for them. In the case of woodlice and symphylans in the tunnels we have been adding a lot of fairly woody compost to the tunnels over the years, and this has increased the organic matter a lot, but also provided perfect conditions for these crop pests. We have seen a rise in numbers of centipedes recently and hopefully these will slowly get ontop of the number of woodlice along with the spiders in the tunnels. 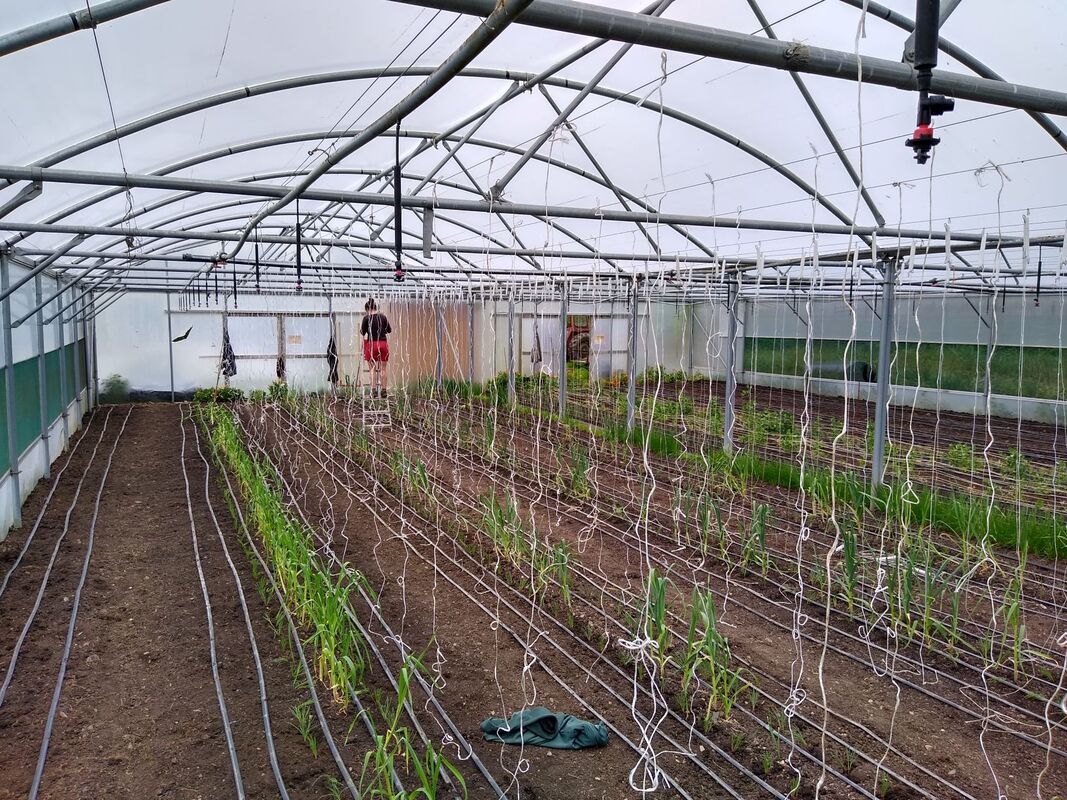 Preparing the tunnel for tomatoes We managed to get our shallots planted, which will be ready to harvest as fresh bunched shallots from some time in July. We also planted another succession of outdoor mangetout and a couple of beds of aztec broccoli which you will be able to try in the summer! It was a good week for hoeing with the sun and the breeze so we got round to a fair amount of that too. Next week we will start to get the peppers and tomatoes planted as well as lots more chard, perpetual spinach, beetroot, kale, spring onions, salads... We are spending more and more time harvesting now as we are getting more of our own produce from the tunnels and early sowings outdoors - with perpetual spinach, red russian kale, radish, salad turnips, spring onions, salad, sugarsnap peas, and new this coming week will be little gem lettuce and rocket that will be going into the bags. It feels great for us to have much more of our own produce going into the veg bags, but we will still need to buy in a few items for the next month or so until we have more variety, so the mushrooms and potatoes are being bought in at the moment, and we may need to get some chard from Shillingford Organics next week. 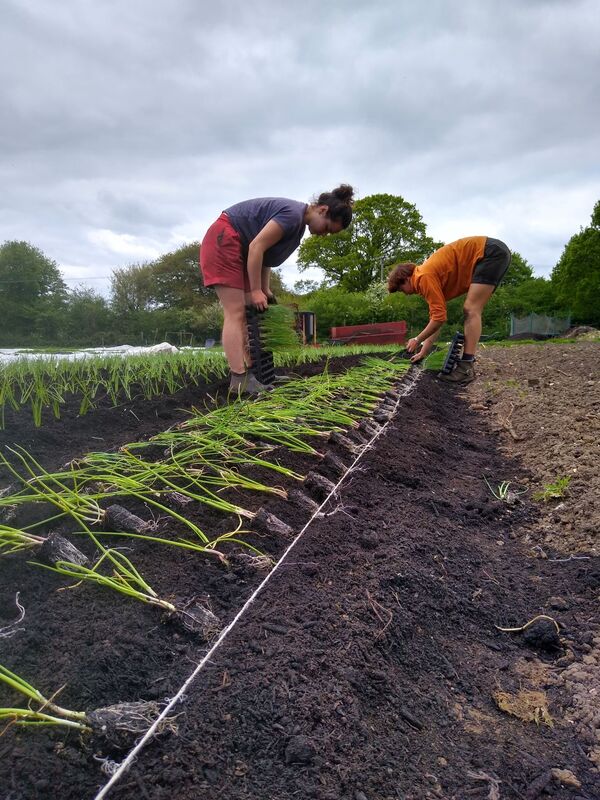 Planting shallots for summer harvests May is one of the busiest months in the garden, April is a pretty busy one too... We have now setup a vegetable box scheme delivering door to door to people in and around Lyme, Axminster and Seaton. 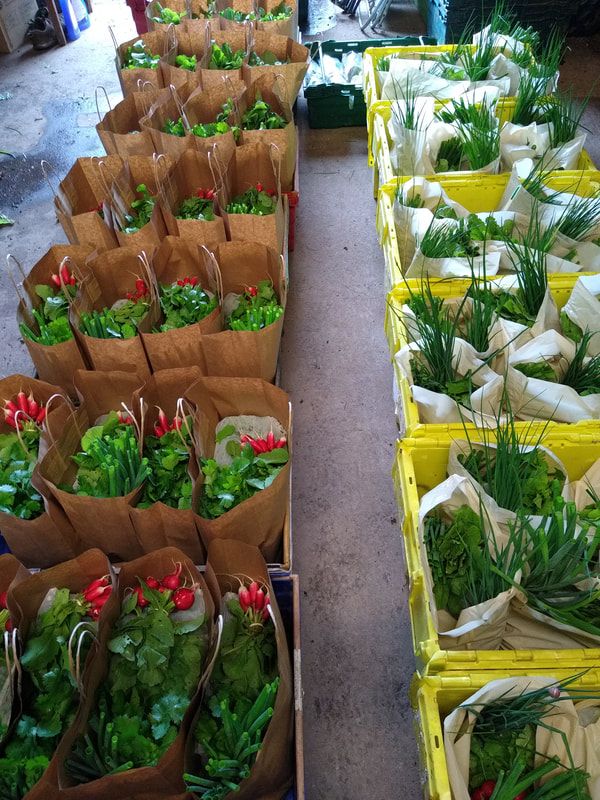 Veg bags being prepared in the packing shed Anyway, it is the time of the year when everything is happening - sowing, planting, weeding and hoeing and the first of the harvests from overwintered crops and early spring crops too. It is a question of prioritising jobs generally, rather than trying to get it all done - you will only get stressed out if you think you can get it all done! We have a sowing calendar and we always try and stick pretty closely to these dates. With some crops it doesn’t matter too much, but we end up doing a lot of successions of a lot of crops to try and keep continuity of harvest of things like beetroot, chard, kale, spring onions, salad leaves, annual herbs, radish, carrots and many more. Other crops sowing time is critical, and if they are sown at the wrong time of the year they will just go to seed really quickly (for example brassica salads like rocket), they may not bulk up in time before the winter (for example chicory - we don’t sow any later than the first week of July, but if you sow them too early they may bolt!), or they may coincide with certain pests - like flea beetle for brassicas from Spring - late Summer, or carrot root fly which can sometimes be missed if the carrots are sown early June and harvested before autumn. 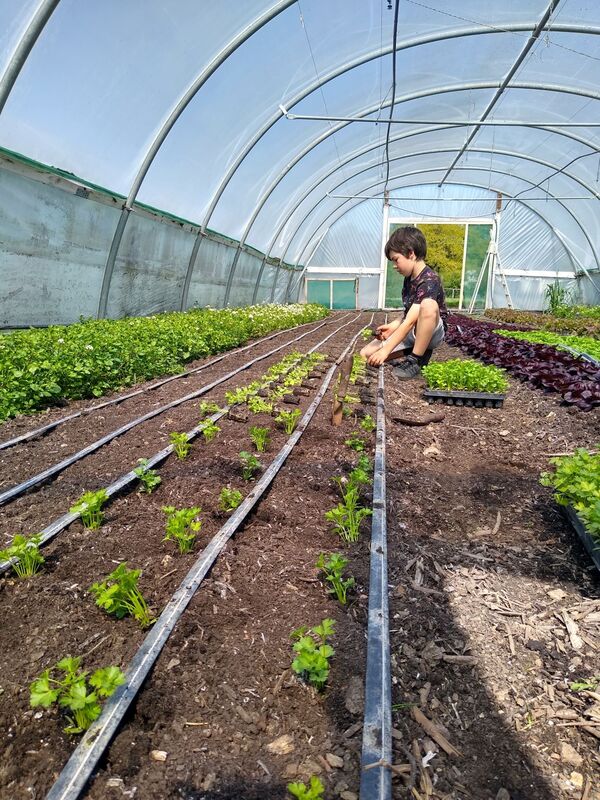 Digby helping to set out parsley plants for planting We aim to have all of our tender summer polytunnel crops planted by the beginning of May, this includes climbing french beans, peppers, tomatoes and cucumbers. This year we were lucky to get a week of wet weather at the end of April which meant that we could focus on the tunnel changeover, from overwintered salads and herbs to the summer fruiting crops. Meanwhile outside throughout April there were plantings of beets, chard, lettuce and other salad leaves, spring onions, shallots, early brassicas - kale, spring cabbage, kohl rabi, mangetout, broad beans, peashoots, turnips and radish and carrot sowings. The courgettes will be going in at the very beginning of May, as could squash and corn, but fleece will be needed to keep the wind off and keep any late frosts off (should be safe by mid-end of May). 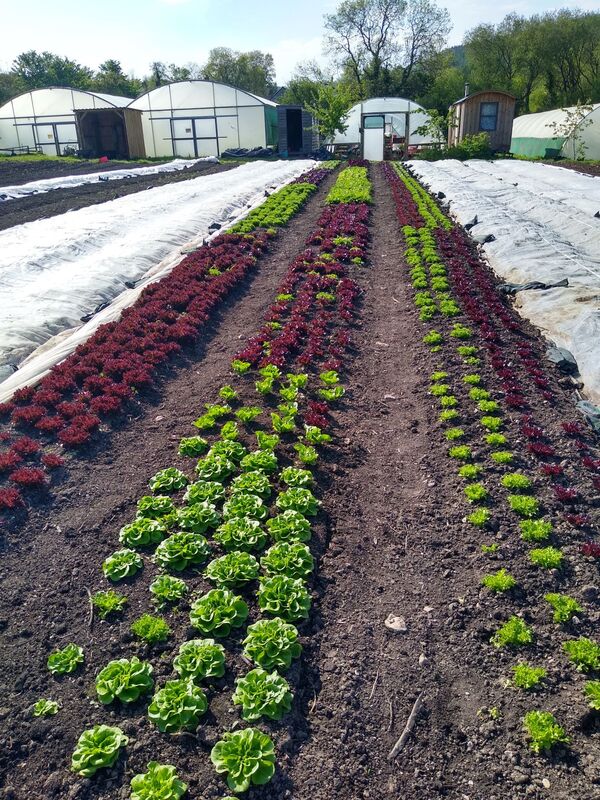 The first of the outdoor lettuce It is a great time of year to be a vegetable grower - and with the rains at the end of a very dry April (after a very wet winter!) everything is looking very lush and growing well. The main pest that we have had to deal with this year is the leatherjacket - the larvae of the daddy long leg or crane fly. The adults lay their eggs from August to October, and wet conditions at that time of year leads to a high success rate of the eggs hatching (which is what happened last autumn). The larvae eat the roots of many plants, and even snip off plants at their base. They are difficult to control organically, though nematodes can be used (but are more effective when applied in the autumn. Otherwise it is a case of checking under new plantings and picking them out, which is pretty laborious but has to be done if you want to save your veg!
So, the big priorities for May are making sure we have all of our seed sowing in order and being done - including successions of things like salads, then making sure everything is getting planted, and finally making sure all of our new plantings are being hoed and weeded...not too much! For more information about our veg bag delivery scheme go to trillfarmgarden.co.uk/boxscheme.html For me, winter begins with the annual meeting of the Landworkers' Alliance (LWA) at the end of November. The LWA is a union of farmers, growers, foresters and landbased workers. Their mission is to improve the livelihood of their members and create a better food and land-use system for everyone.
After being so occupied with producing veg through the spring and summer we can reconnect what we do with the wider movement. On the one hand we are just vegetable growers on 2.5 acres in East Devon, but we are also part of a union that links us to over 200 million peasant and small scale landworkers around the world through our connection to La Via Campesina. As members of the LWA we are part of a bigger union that brings solidarity and strength to what we do. We go from being solitary farmers in a field to part of an international community of farmers, growers, woodland workers and fisherfolk from around the world. From being small insignificant voices we become a strong voice with a place at the table alongside the larger lobbying groups. The current political uncertainty has paved a way for us to join the debate and influence policy. We are now seeing manifestos supporting small scale farmers and using food sovereignty as a framework for farming and the food system. Food Sovereignty is the right of peoples to healthy and culturally appropriate food produced through ecologically sound and sustainable methods and their right to define their own food and agriculture systems. It puts those who produce, process and consume healthy and local food at the heart of our agriculture and food systems, instead of the demands of market and transnational companies. Being involved with the LWA has inspired us to make training and seed production integral to what we do in the garden. We will be involved in developing a traineeship network helping to bring together market gardening trainers and trainees to exchange knowledge and experience which will enrich the training and give trainees a broader knowledge base. By being part of the wider community of farmers, growers and woodland workers we are beginning to develop the food systems which are underpinned with the values of food sovereignty. Together we will make a difference. As the nights draw in and the hedgerows are bright with the colours of autumn, the garden enters a new, slower phase of life. Plant growth becomes more gradual and we have time to reflect on the past year and make plans for 2019. This year has been one of extremes – snow in spring followed by intense heat and drought. Not an easy year for growing vegetables and I know it’s led many UK growers to think more about climate change, extreme weather events, and what that means for their businesses. Here at Trill, we address the problem by creating diversity in the garden. Diversity in the crops we grow, diversity in our fertility-building green manures and diversity in the seeds we sow. We grow more than 60 different vegetable crops over the course of the year, over 125 different varieties and have 8 different plant species in our green manures (most growers only use 1 or 2). All this means that we can offer a diversity of vegetables to feed our customers, a diversity of plants to feed our soil and what’s more, whatever the weather, something will grow well! 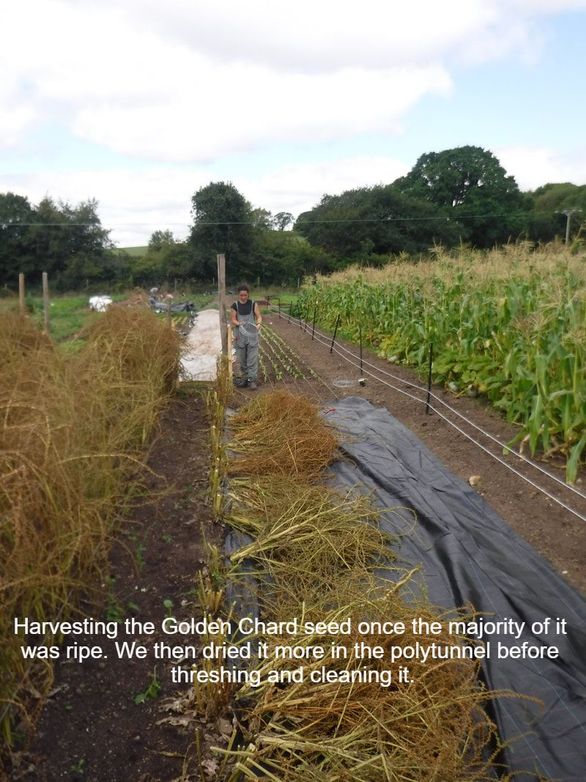 Our dedication to diversity also stretches to the seeds that we save and sow. The dry, warm summer was perfect for seed production and we harvested enormous seed crops of Golden chard and a parsnip called ‘Tender and True’ for The Real Seed Catalogue in Wales. Both these varieties are genetically diverse, open pollinated plants which ‘breed true’. This means that we can grow a number of plants of a variety, allow them to cross pollinate and we end up with offspring which are similar (but not identical) to the parent plants. Importantly, cross pollination maintains the genetic diversity in these varieties, ensuring that the crop has the means to adapt to future growing conditions. In the case of our Golden chard, this genetic variation is clear – the stems come in every shade of yellow from buttercup to mustard. With our ‘Tender and True’ parsnips, the differences are much more subtle, perhaps one is more resistant to canker, another might be more tolerant of drought. Our chard and parsnip seed crops are just two of many crops we save seed from. All in all, we have around 40 varieties of 20 different crops in our seed stock which we have grown ourselves. 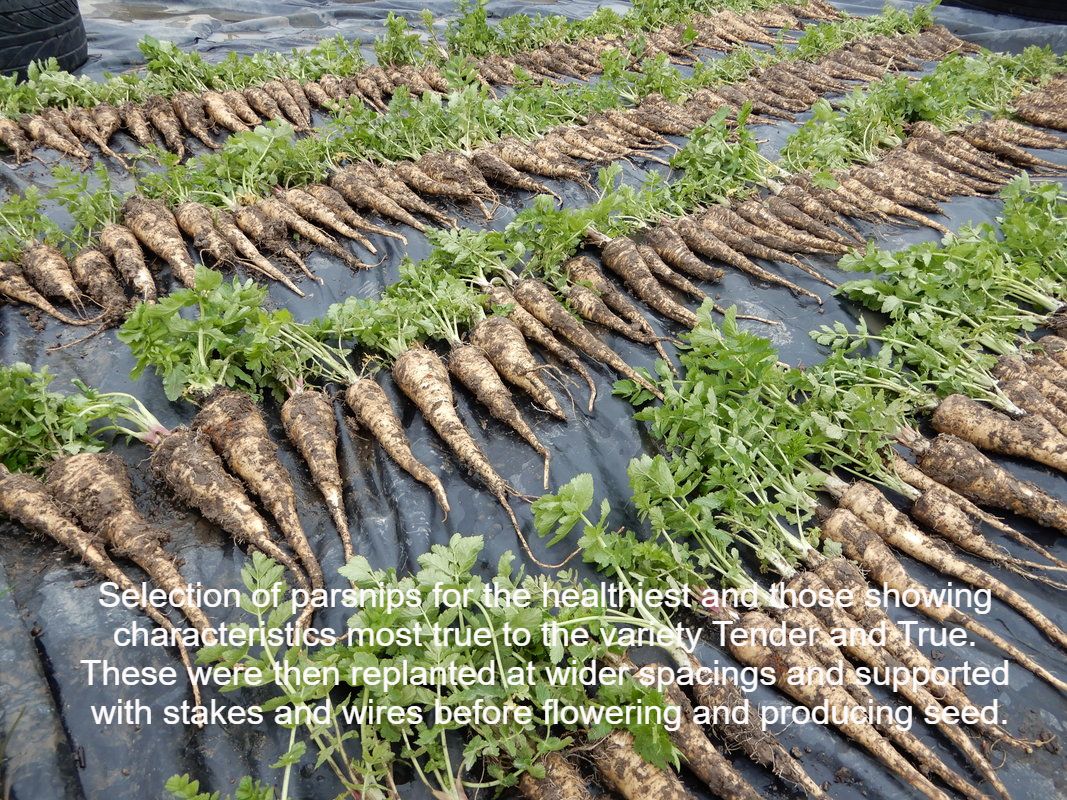 Before we save seed from a particular crop, we always choose the best examples of that variety to use for seed production. That way, each year we save seed, we’re choosing the plants that are best adapted to our growing conditions, our soil and our micro-climate. Eventually, we’ll end up with plants that are specifically adapted to our site. This process can take a little patience – biennial crops take 2 seasons before they flower and set seed - but experience shows that the quality of our homegrown seed outperforms the seed that we buy in, and so we continue.
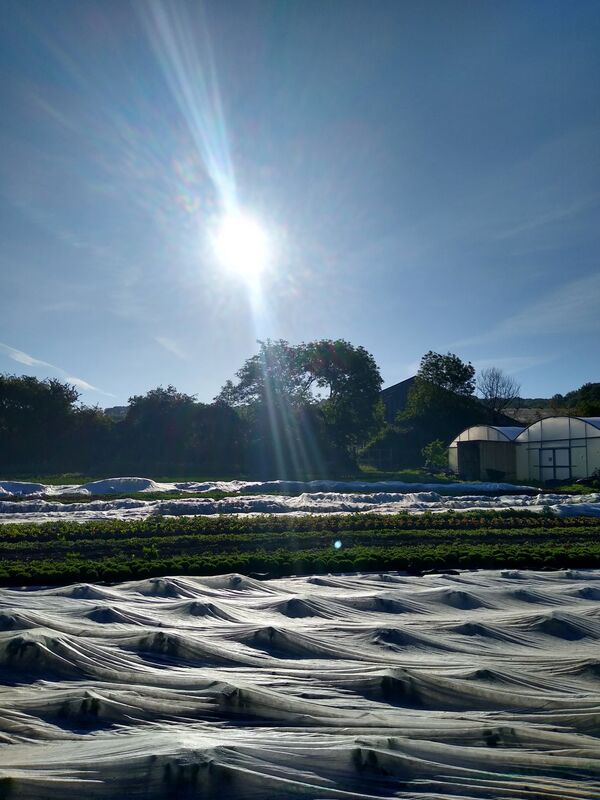
Ellen (Senior Grower and Seed Production Coordinator, Trill Farm Garden) October marks the beginning of change in the garden, as summer makes way for autumn. The polytunnels are cleared of their summer crops; tomatoes, beans, cucumbers, peppers and chillies being cleared for winter salad leaves, herbs and a few early spring crops such as spring onions, sugarsnap peas and early garlic. Meanwhile, outside the summer crops have also faded with the courgette and french beans plants slumping back into the soil from which they came, the runner beans still just about standing but not producing much, and the squash and sweetcorn all harvested. 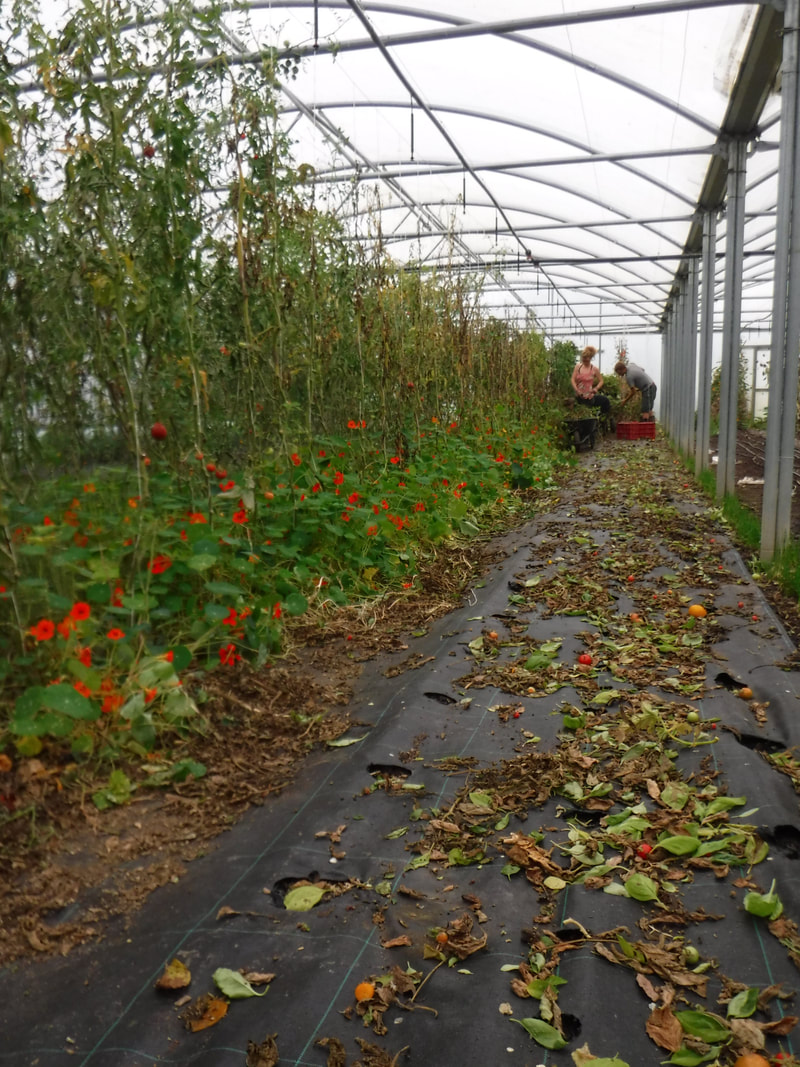 Preparing the polytunnels for planting our winter/spring crops is usually a case of clearing the old crops by cutting back the plants at ground level, leaving the roots in situ to provide food for the life in the soil and also help with drainage as they leave channels in the soil once they break down. Normally the beds are then soaked thoroughly for a day and then raked. This takes off any lumps of compost that hasn't broken down in the summer and breaks up other lumps of soil to create a fine tilth for planting into and minimises hiding places for slugs and snails. Depending on what crop has been growing there is normally enough fertility from the compost that was spread in the spring, so the beds are not usually mulched again before planting the winter crops. Once planted, the beds are given another thorough soaking from the overhead sprinklers to help the plants get settled in. Then we usually water with drip irrigation to minimise slugs. 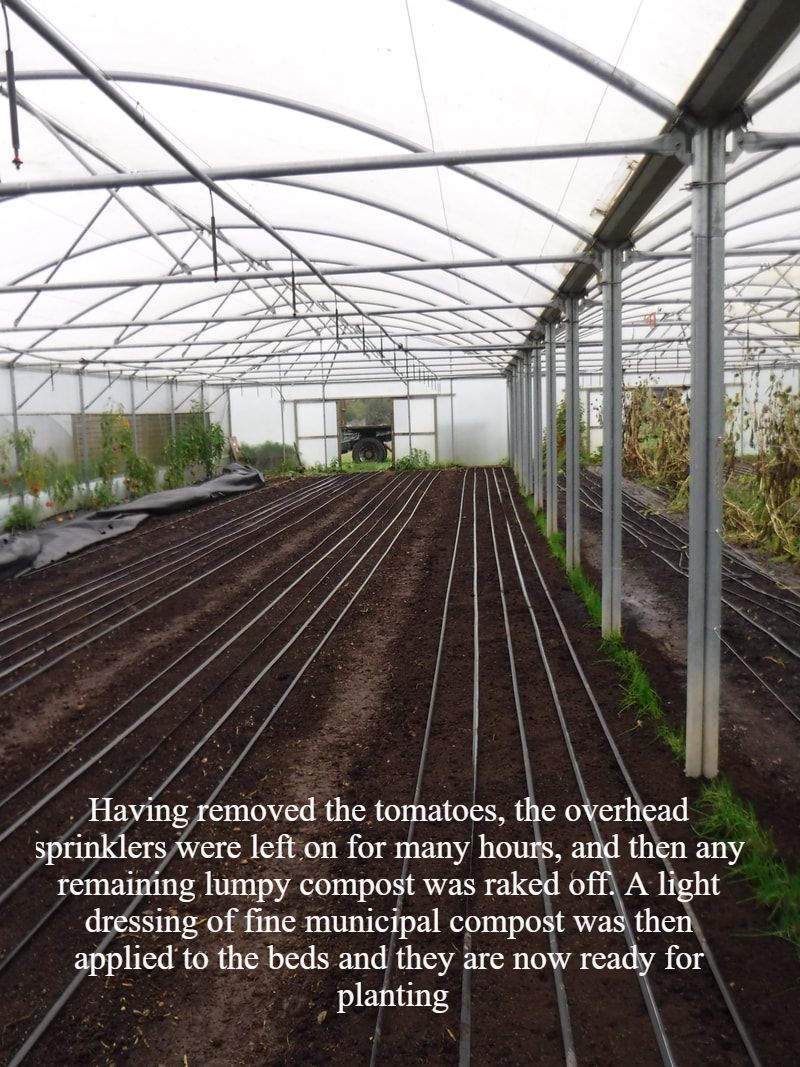 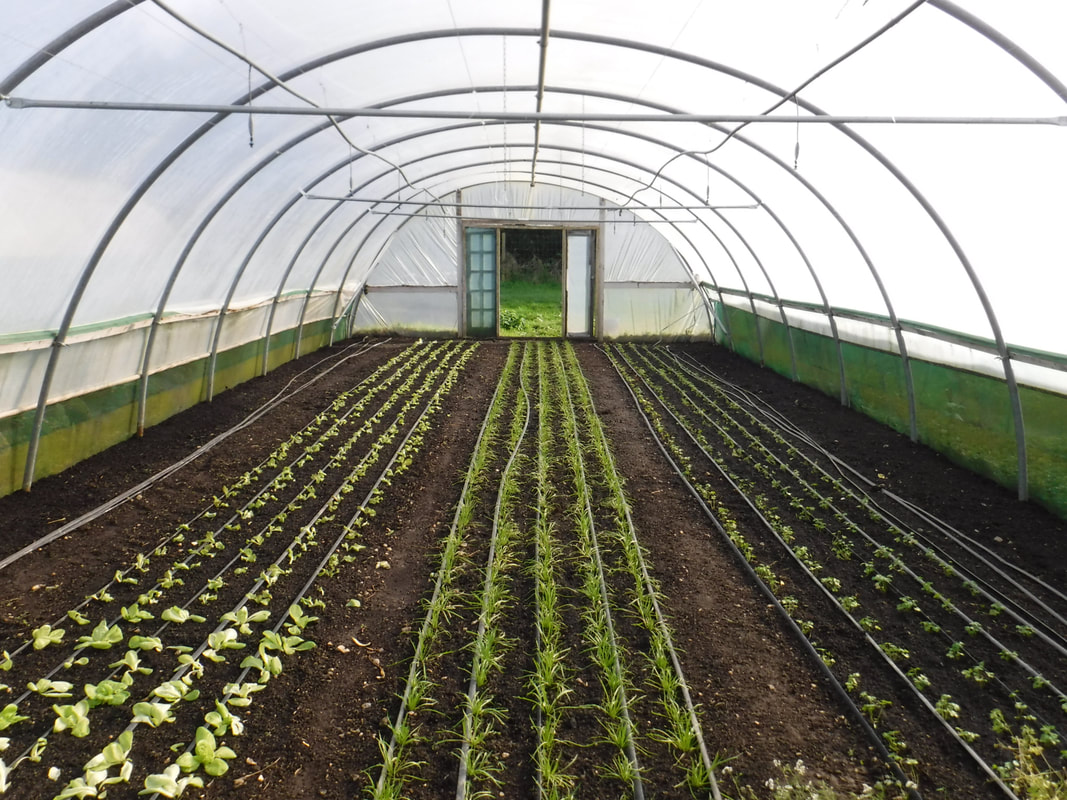 Outside is dealt with quite differently. It all depends on how wet the ground is in October as to how we manage the soil over winter. Ideally the ground will be dry enough to cultivate lightly before sowing overwintering green manures, usually consisting of cereals such as rye, oats or even wheat and maybe some vetch. This is easily done on beds that have been covered in mypex through the summer and are relatively weed free. Here we can remove the mypex, folding it up neatly and labelling it for next year and let any weeds germinate before hoeing off and direct sowing the green manures in rows about 10-15cm apart to allow inter-row hoeing. The overwintered cereals are very good at holding onto nutrients over winter and reducing soil erosion and leaching caused by the winter weather. 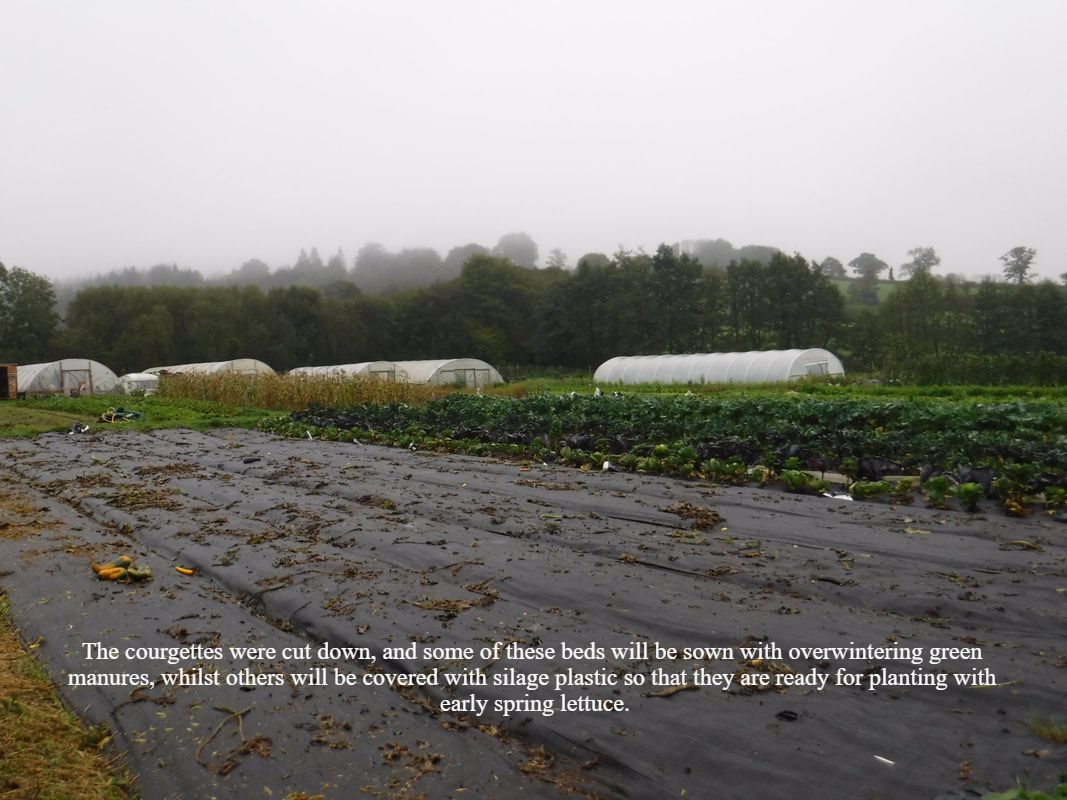 Preparing ground for early plantings in the spring usually means covering with silage plastic, held down with sand bags. Again, depending on the preceding crop and how much compost has been applied we may spread some compost before covering with the silage plastic. This protects the soil over winter, minimising leaching of nutrients from the winter rains, but also kills off any crop residues and weeds. Then in the spring, the beds are weed free and almost ready to be planted. The plastic keeps the soil quite dry so that we can cultivate early in the spring if we need to – normally just reforming them with the bedformer.
If other areas are too weedy to create a good seed bed and do not need to be planted early in the spring then we tend to leave them weedy to cover the soil overwinter. Many weeds act as well as any other green manures overwinter – their roots protecting the soil structure and maintaining biological activity in the soil. These beds can then be dealt with later in the spring once it has dried enough to get the tractor on to cultivate. We are slowly moving away from ploughing the garden, and now only bring in the plough to turn in clover green manures that have been growing for a couple of years. This means that only one out of all nine plots of the rotation is being ploughed every year now. We are working towards minimising cultivation as much as possible and will be putting a few no dig beds into our outdoor cropping next year. We always grow parsley in the tunnel, just for superior quality and fast regrowth – much like we do with most of our soft herbs – coriander, chervil and basil mainly.
We aim to have parsley all year, though there can sometimes be a bit of a gap around end of April to end of May depending on how early we have planted the February sowing. We only do two sowings, one in early-mid February and one in early-mid August. The first sowing we plant into the tunnels around early April and harvest through the summer and autumn. We usually leave some of this in all through the year and over winter, but aim to have the second sowing planted in September so that it gets well established and can be harvested through winter and spring. The February sowing usually goes to seed just a bit earlier than the August sowing. We have always used Italian Giant, which we have saved seed from for the past 4 or so years. We save seed each year – making sure it is not from plants that go to seed early, to ensure that we always have fresh seed to sow, as it does not keep particularly long. We found huge improvements from sowing from our own saved seed for parsley, and there is the added benefit of allowing it to flower, which as an umbellifer attracts huge amounts of beneficial insects. We sow two to three seed per module in West Riding compost, cover the seed with a sprinkling of vermiculite, then soak the trays from the bottom. These are then covered in polystyrene for about 10 days, so that the seed can take in enough water and then the polystyrene is taken off to allow light to get to the trays. We have started growing some curly leaf parsley too, as some restaurants prefer this as it tends to have a stronger flavour, and so they need less of it. When harvesting parsley we cut the plants right down, a few inches above the soil surface, we weed as we harvest and remove any older leaves from around the plants too. The only problems that we have ever had is some mildew if the soil is not moist enough, but the plants always seem to grow out of this come spring when they grow rapidly again. Having grown for seven seasons we are feeling much more in control of the growing side of the business at Trill Farm Garden. Winter is naturally a time of reflection, so we look at how the year has gone and whether there are changes to be made for the next year. As the years go by there are fewer and fewer changes to be made as we refine our cropping plan based on what has sold well the previous year, what grows well on our soil and what makes us a living from our small area of land that we work.
As we have built up our business it has allowed us to take on more labour, mainly people who have come wwoofing at the farm, then became friends and then continued to work for us as paid labour. We have also had an informal trainee for the past three years. We are really lucky to have had such a great team of friends working with us who are interested in vegetable growing. A significant benefit that small scale family farms offer over larger scale farms is the labour requirements needed to run them. This means that where the average farm employs 0.017 people per hectare, small farms employ 0.72 people per hectare. One of the autumn projects this year has been to tidy up some of the spaces around the polytunnels by making beds for growing cut flowers for our summer stall in Lyme Regis, and for growing raspberries (mainly for ourselves...). We have been using offcuts from the sawmilling that is done at Trill to edge the beds, to stop the weeds from creeping in at the edges, and making use of the woodchip which has been produced from clearing around the power line that goes through the farm. We are still processing seed that we saved through the year – some for ourselves, and other grower friends, and some for the Real Seed Catalogue. We have huge amounts of orache and salad burnet for our summer salad mix, lots of beans and tomatoes, and our first biennial seed crop from a beetroot called Avon Early which I got through the Heritage Seed Library. We have grown chillies, sunflowers and poppies for the seed catalogue, and have turnips growing in the tunnel which we will save seed from next summer. One of the best and easiest successes from seed saving this year was the strip of coriander that we kept in at the edge of one of our polytunnels. We were able to save a huge amount of seed very easily, but before that the coriander flowered and was host to a great diversity of insects including many parasitic wasps which in turn predated on the aphids in the polytunnel. Allowing plants to flower like this often attracts many beneficial insects, many of which often eat the crop pests. Helping to create this balance is a fundamental organic principle and doing so whilst also producing a crop of seeds is ideal. Plant selection Select strong healthy plants with characteristics that you are looking for. If it is an heirloom variety that you are saving, it is best to select the variety that best fits the description of the variety. If you want to select varieties that fruit earliest, then select the earliest fruiting each year. 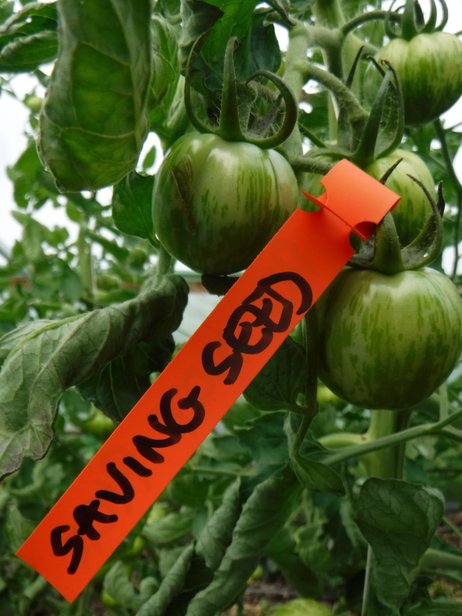 Clearly label the plants that you have selected. Tomato plants generally do not cross with one another (they are in-breeders) so you can grow and save seed from more than one variety in one polytunnel. Harvest and processing 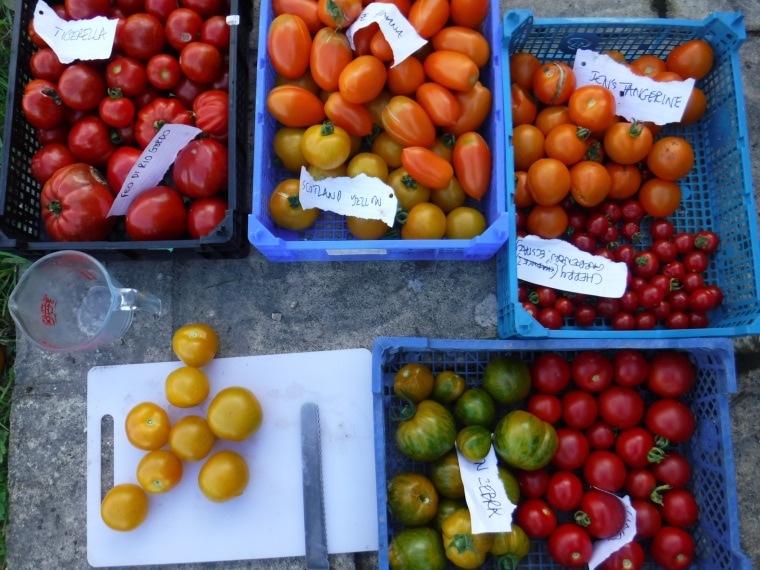 Once the fruit is over-ripe for eating it will be ready for harvesting for seed. At this stage take all the ripe fruit off the plants, then slice them along their equator (use a bread knife for this as it is less likely to damage the seed). Then squeeze out the pulp into a container. 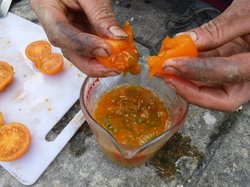 This can then be left for 3-4 days to ferment (this breaks down the germination-inhibitor that surrounds the seed). Do not leave for longer than for days as premature germination can occur. You may notice a mould appearing at the top of the pulp – this is fine and all part of the fermenting process. 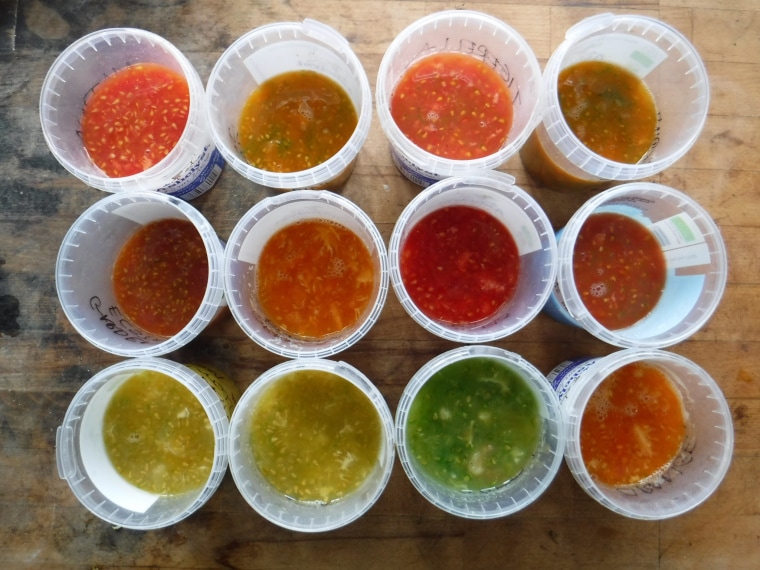 Once fermentation is completed then poor the pulp/seed into a long necked container – something like a milk bottle works well. Fill it up to ¾ full and shake the bottle vigorously (with a lid on…). This helps to separate the seed from the pulp. As the seed starts to settle back down to the bottom of the bottle you can start to decant the pulp and water. A few small, light seeds may also come out. Decant until most of the water has left the bottle then repeat this process 5 or 6 times, or until the seed looks clean. Fill up the bottle, now with clean seeds in, one last time and empty into a sieve. Blot the bottom of the sieve with kitchen towel to dry excess moisture and then turn out the seeds ideally onto a non-stick surface such as a plastic chopping board. Using the bottom of the sieve, spread out the seeds evenly to form one layer of seeds. As you are doing this you can have a bit of kitchen towel inside the sieve which will take away some of the moisture without the seeds sticking to the towel. 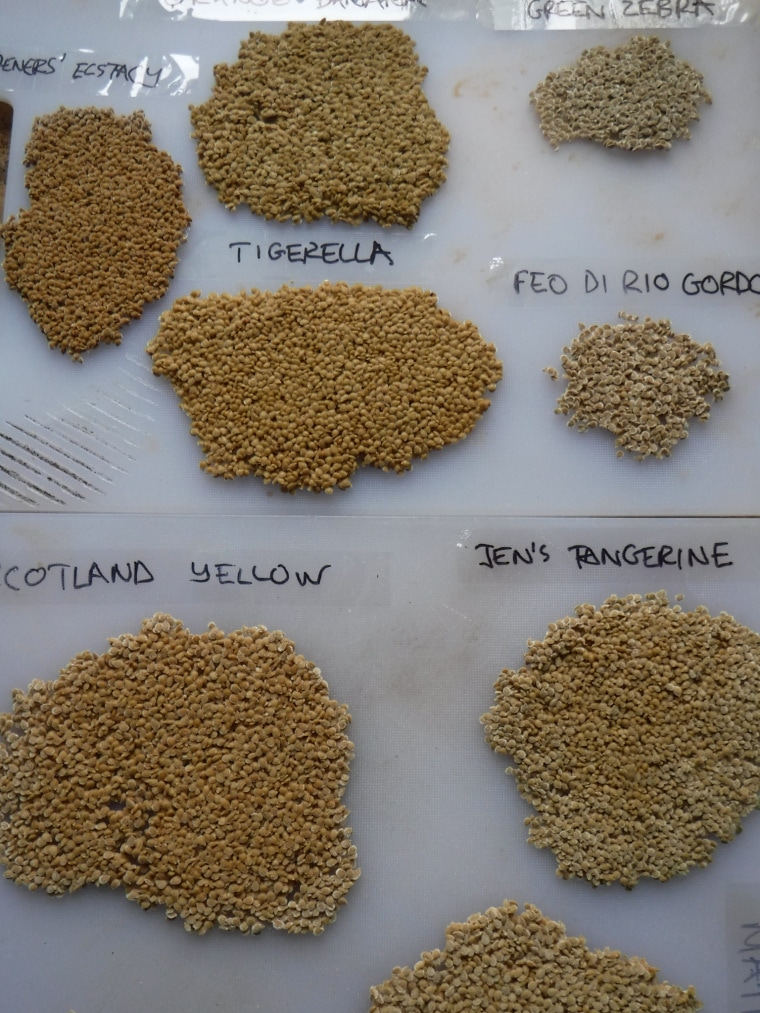 Label the seeds and put somewhere dry and airy to dry further. Once the seeds have dried they will peel off the chopping board in one piece. They can then be crumbled up into a paper seed packet and dried further using silica gel. To do this put the seed packet inside an airtight container and put the same amount of silica gel in the bottom of the container. Put a humidity reader into the container and close the lid. Leave until the relative humidity is around 50%. Then remove the silica gel and store the seeds in the airtight container somewhere cool and dry, and they should keep for up to 5 years. Don’t forget to clearly label the seed packet with the variety and the date.
|
AuthorAshley has been running Trill Farm Garden since 2010 with his partner Kate. Ellen is the Senior Grower and Seed Coordinator at Trill Farm Garden. Archives
November 2023
Categories |


 RSS Feed